RIBA Plan of Work Stages: How They Shape Construction Projects
Every RIBA stage exists to answer a specific question at the optimal time to prevent project delays or extra costs.
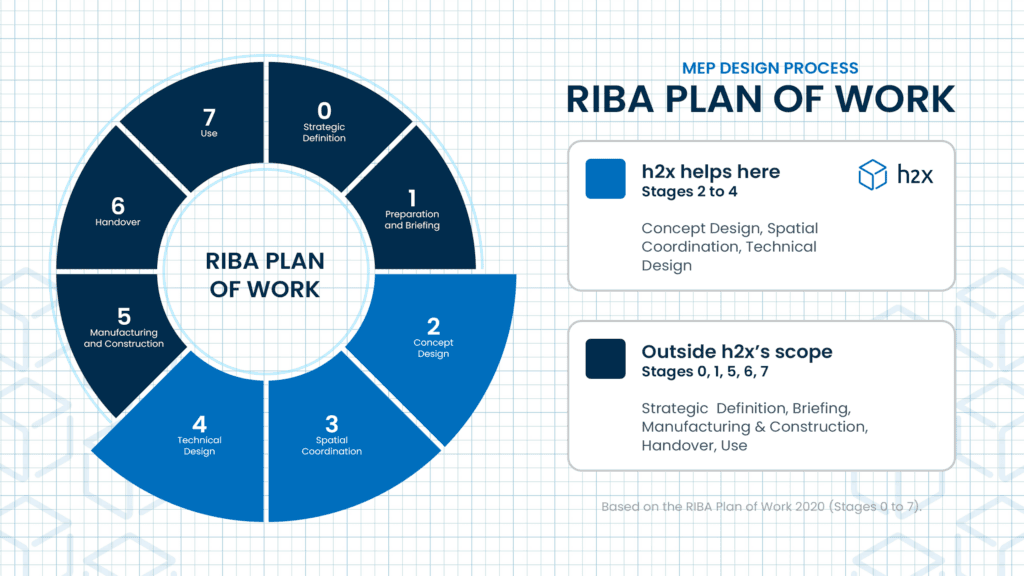
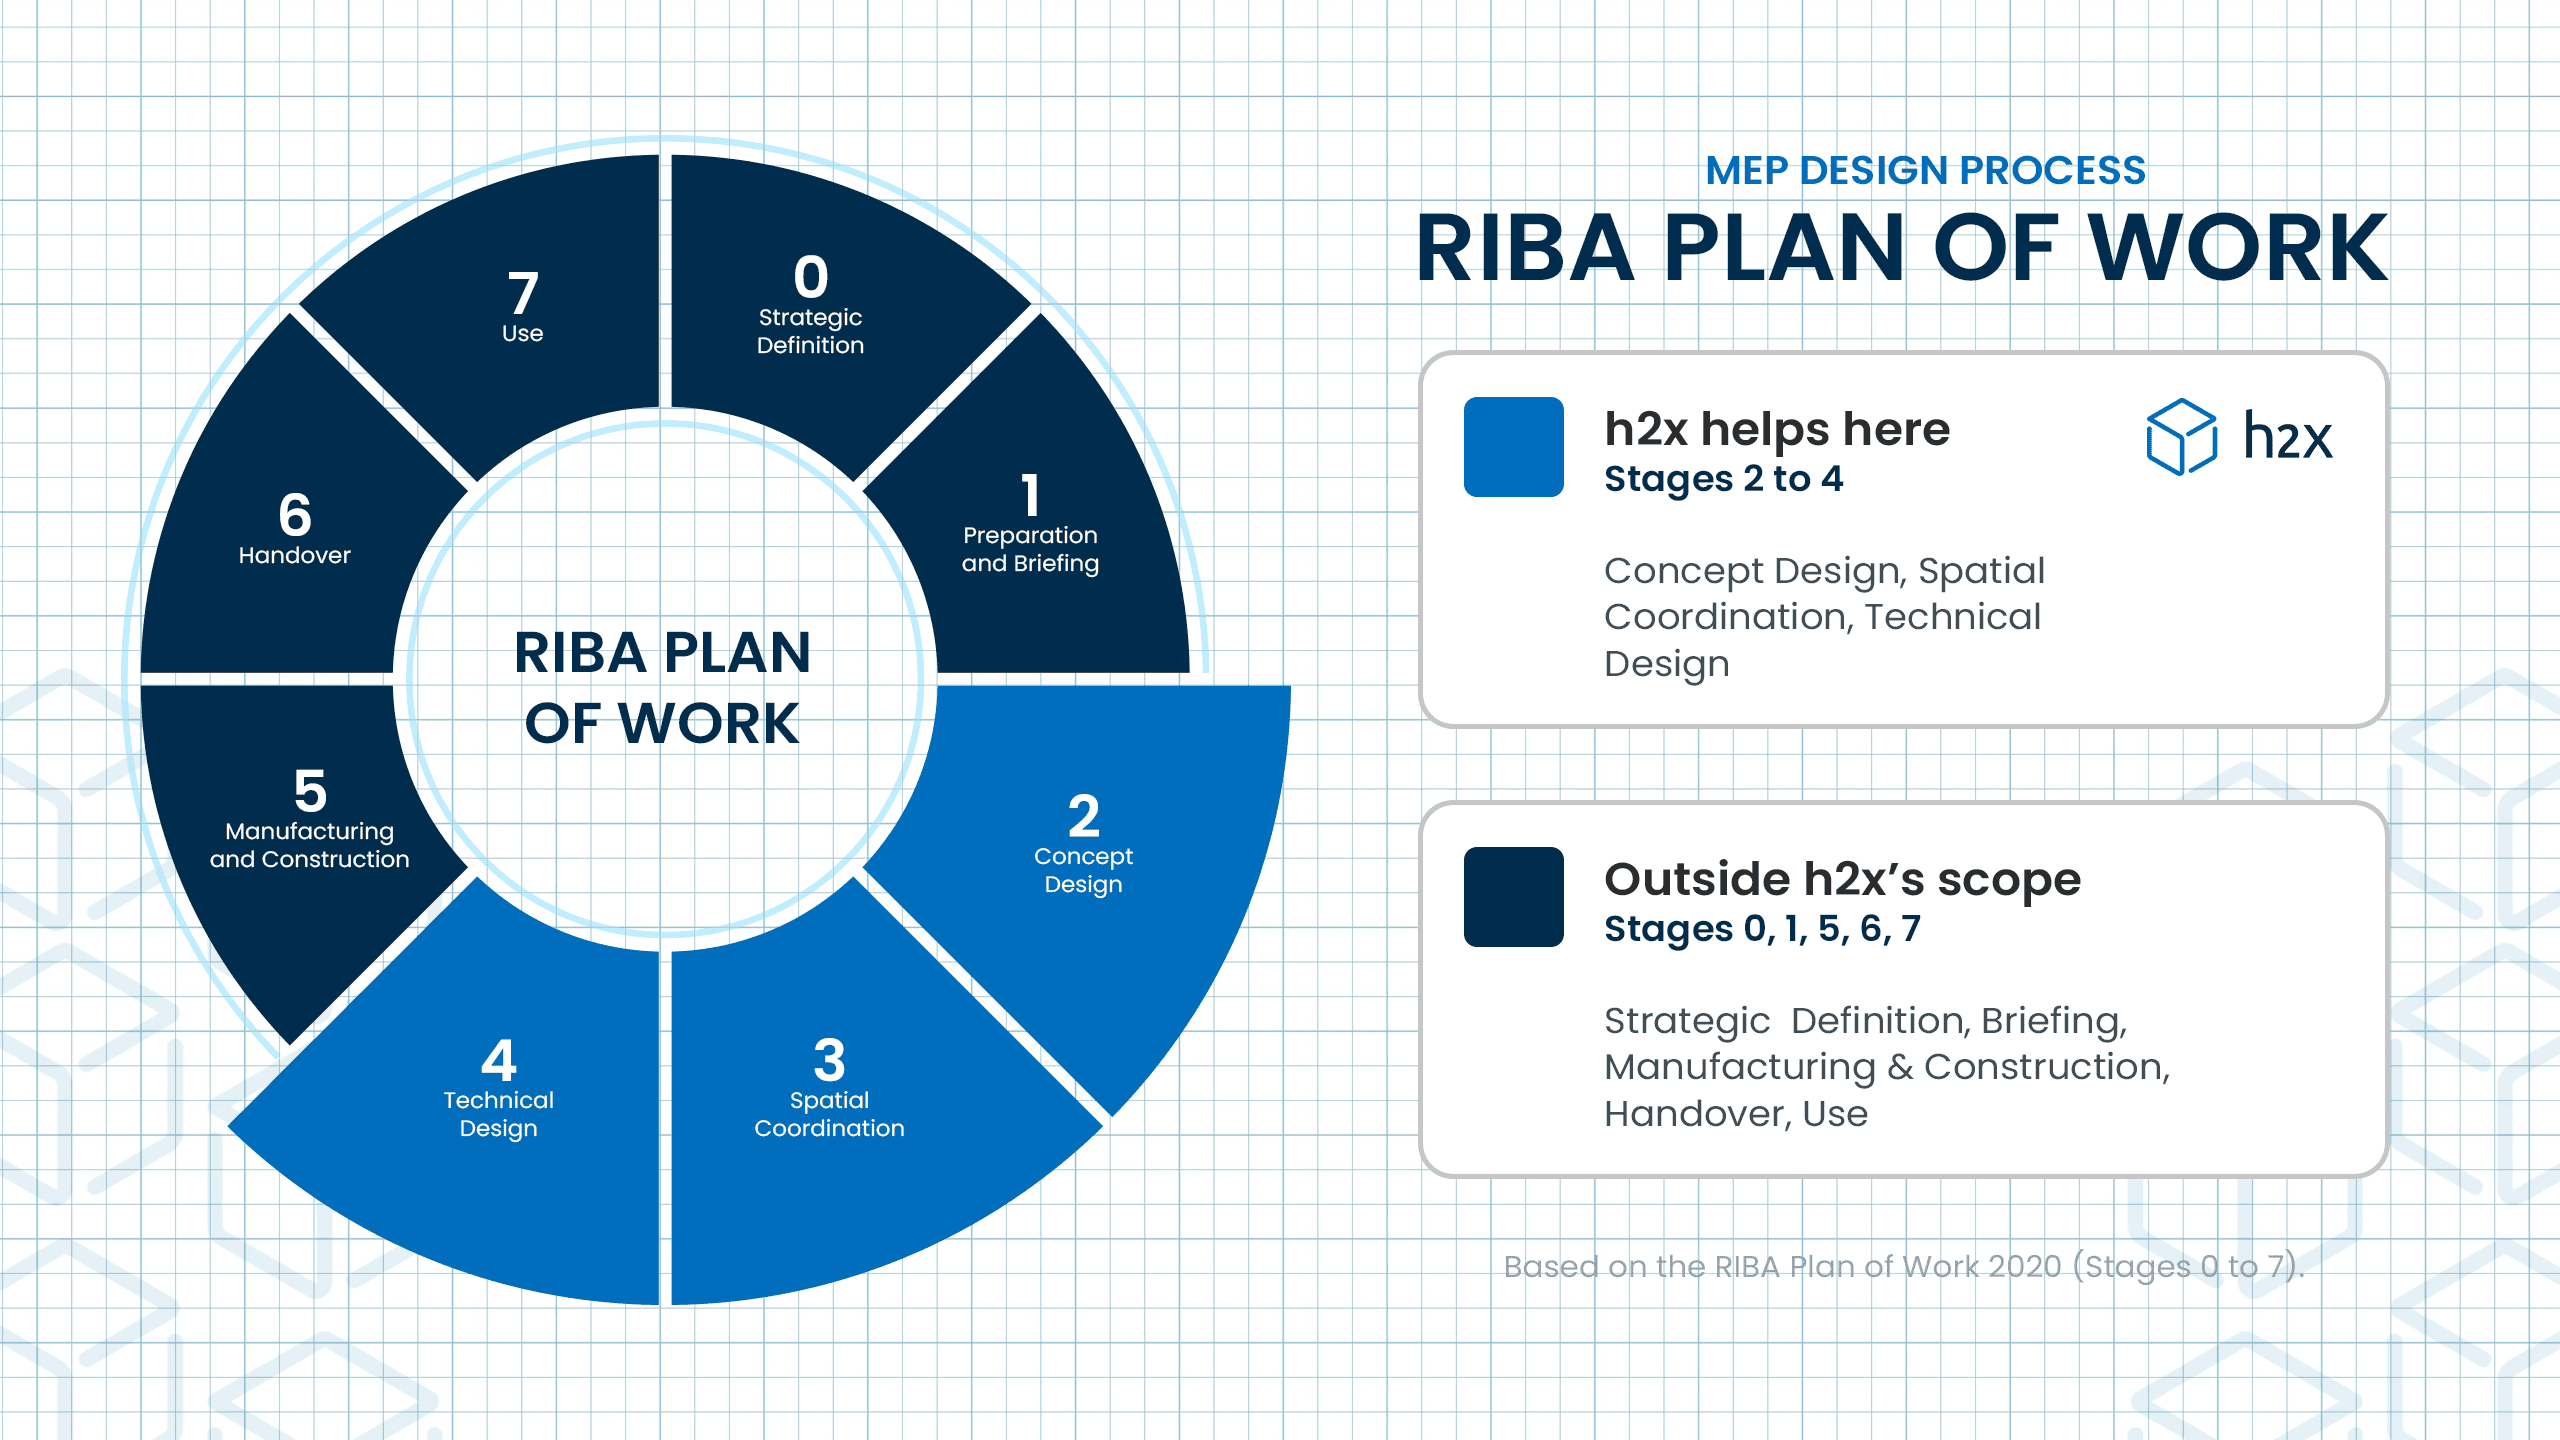
The RIBA Plan of Work Stages split a construction project into eight phases, 0 through 7, starting with strategic definition and going through to in-use monitoring. Skipping or rushing a stage will only push that work later, to a project stage where it will be more expensive to fix.
MEP engineers can think of the stages as set around important milestones. RIBA stages help mark when loads get calculated, when systems get coordinated, and when designs are locked for construction.
Key Takeaways
- The RIBA Plan of Work has 8 stages (0-7), each with a defined output required for the next stage to proceed.
- Decisions made early, such as at Stage 1 or Stage 2, are the cheapest to change and the most expensive to attempt to revise later.
- Stage 3 (Spatial Coordination) is where clashes between MEP, structure, and architecture should surface, and not later, in Stage 5, which takes place on site.
- h2x is built for Stages 2 through 4, concept through technical design, where load calculations, system sizing, and coordinated layouts happen.
- h2x does not cover strategic briefing, site logistics, or post-occupancy energy monitoring. While an h2x user can take advantage of read-only views and system drawing exports, the later stages in the RIBA Plan of Work exceed its scope.
What Is the RIBA Plan of Work?
The RIBA Plan of Work is a stage-by-stage framework for structuring a building project, published by the Royal Institute of British Architects. The current 2020 version defines eight project stages, numbered 0 to 7, with a clear set of tasks and a defined information output that feeds into the next stage.
Many industry professionals use the RIBA Plan, including architects, consultants, contractors, and manufacturers. The plan offers a shared language for understanding project advancement, roles, and decision making.
Why Is the RIBA Plan of Work Important?
Without a shared stage structure, teams might work from different assumptions about how settled a design is. For example, without the RIBA structure, an engineer might size ductwork against a floor plan the architect considers provisional. Or, a contractor might price a system that hasn’t been coordinated with structure yet. Both problems could delay a project or require costly fixes.
When teams follow the RIBA stages as intended, everyone knows what “done” looks like at each point. Achieving consensus in this way can lower project costs, reduce rework, and prevent costly on-site errors.
Following a shared structure offers the most benefit for consulting engineers and contractors, who sit between an architect’s intent and a buildable, code-compliant system. They often inherit the cost of skipped or incomplete stages.
What are the Eight RIBA Plan of Work Stages?
| Stage | Name | Key Output |
|---|---|---|
| Stage 0 | Strategic Definition | The client confirms the business case and establishes whether a new building, an extension, or a refurbishment is the right answer. |
| Stage 1 | Preparation and Briefing | The project brief, site information, and feasibility studies are pulled together, and the project team is appointed. |
| Stage 2 | Concept Design | The architectural concept takes shape, and outline structural and MEP strategies are developed alongside it. |
| Stage 3 | Spatial Coordination | Architecture, structure, and MEP are coordinated in detail. This is where high level clashes get resolved (main service runs, interacting with structural elements), before they reach the construction site. |
| Stage 4 | Technical Design | All design information needed for construction and manufacturing is completed, including detailed MEP calculations and specifications. Detailed clash detection is needed for final connection and component placement. |
| Stage 5 | Manufacturing and Construction | Components are manufactured, and the building is constructed against the technical design. |
| Stage 6 | Handover | Building services are tested and commissioned, and the building is handed over with as-built information and manuals. |
| Stage 7 | Use | The building is occupied and monitored, checking that it performs as the design intended. |
The RIBA Plan: Common Mistakes and Challenges
- Skipping or truncating Stage 2. Teams sometimes skip proper outline MEP sizing at concept stage, only to discover problems in a later stage. Some examples include risers, plant rooms, or ceiling voids were not sized to fit.
- Under-resourcing Stage 3 coordination. Spatial coordination often gets compressed to save time. This can lead to clashes between ductwork, structure, and ceilings that surface during construction instead of on a model.
- Freezing Stage 4 too early. Locking technical design before full spatial coordination is complete can force later changes that ripple through calculations, schedules, and drawings.
- Weak handover documentation. Rushed Stage 6 handovers leave facilities teams without clear O&M manuals or commissioning records, which can result in call-backs during Stage 7.
- No feedback loop into Stage 7. Few projects formally check in-use performance against the Stage 0 brief. However, doing so prevents valuable lessons about system sizing from improving the next project.
Example of the RIBA Stages in Practice
On a 40-unit residential scheme in the Southeast, an MEP consultant used outline heat loss figures from Stage 2 to size a communal riser at Stage 3 spatial coordination.
The Stage 2 model was based on a fabric specification typical of the local Building Regulations Part L target. This meant U-values around 0.18 W/m²K for external walls and 0.13 W/m²K for the roof. Together, they indicated a building heat loss in the region of 180 kW across the block. That figure was enough to rule out a single 150 mm riser and confirm a twin 200 mm arrangement serving two heat pump plant rooms, one per stair core.
Because the riser was confirmed early, the architect held the shaft size through to Stage 4, even as the structural engineer revised the transfer beam design twice and the facade package changed supplier.
Notably, locking the riser dimension meant those changes could happen around a fixed void rather than forcing a fresh clash detection pass every time. As a result, this approach helped avoid a redesign that would typically take two to three weeks on a project this size, including renegotiating shaft space with structure and fire strategy.
At Stage 4, the same load calculations were refined room by room into final pipe sizing and a bill of materials covering roughly 1,400 m of pipework and associated valves and manifolds. Because the underlying model carried through rather than being rebuilt from scratch, contractors at tender could work from validated schedules instead of re-deriving loads themselves. This cut the estimating time they needed by roughly a third.
RIBA Stages: Best Practices and Tips
- Size systems early, even roughly. Outline heat loss and load figures at Stage 2 to prevent oversizing risers, plant rooms, or duct routes. Oversized systems can disrupt Stage 3.
- Cover clash resolution in Stage 3 and Stage 4, before you’re on site. Coordinate MEP against structure and architecture before technical design locks.
- Keep calculations traceable across stages. Carry the same assumptions and figures from concept through technical design so nothing gets re-derived (or contradicted) later.
- Document as you go. Build O&M and commissioning records progressively through Stages 4 to 6 instead of compiling them under deadline pressure at Stage 6.
- Close the loop at Stage 7. Where possible, check actual building performance against the design brief. This helps sharpen approaches on the next project.
How h2x Design Software Can Help
H2x offers strong support for Stages 2 through 4, concept design through technical design, where MEP consultants need calculations and layouts.
At Stage 2, h2x’s heat load and heat loss calculations give an outline sizing basis fast enough to inform architectural decisions on riser and plant space before they’re locked in.
At Stage 3, updating a background as architectural plans change and re-running calculations in seconds helps pipe and duct system layouts stay coordinated with structure and architecture as the design settles. This benefit also carries over into Stage 4 if any detailed connection changes need to occur.
At Stage 4, h2x’s CIBSE-verified system sizing calculations, branded PDF drawing sets, bill of materials, and Revit and AutoCAD exports produce the coordinated, construction-ready technical design package this stage requires.
h2x doesn’t run Stage 0 to 1 feasibility or briefing work, manage Stage 5 site logistics or construction programming, or handle Stage 6 commissioning workflows and Stage 7 in-use energy monitoring. If your project needs support at those stages, pair h2x with tools built specifically for them.
Conclusion
The RIBA Plan of Work only works if each stage actually delivers what the next one depends on. For MEP consultants, that means getting sizing right early and keeping it coordinated through technical design, not catching problems on site.
Frequently Asked Questions
Is the RIBA Plan of Work only used in the UK?
The RIBA Plan of Work originates in the UK, but many international consultants and contractors reference or adapt it. This is frequently the case on international projects with UK-based design teams. It can sit alongside other national frameworks as well.
What’s the difference between Stage 2 and Stage 4 for MEP design?
Stage 2 produces an outline MEP strategy: indicative system types, rough sizing, and space requirements. Later, Stage 4 produces the detailed technical design, including final calculations, sizing, specifications, and drawings ready for construction.
Can stages overlap or run out of order?
In practice, yes. The 2020 version explicitly allows overlapping stages where it suits the project. This is particularly true between Stage 3 and Stage 4. However, even in an overlap scenario, the key output of each stage still needs to be reached before the next stage.
Who is responsible for each RIBA stage?
Typically, responsibility shifts by stage. Architects typically lead Stages 0 to 2, and the full design team (including MEP consultants) drives Stages 3 and 4. Later, contractors take the lead through Stage 5, with the design team supporting handover at Stage 6.
Ready to carry domestic water sizing cleanly from Stage 2 through Stage 4?
See how h2x handles heat loss calculations, riser sizing, and coordinated layouts without re-deriving loads at every handoff.
Meet the author

Michael Ainscough
Michael Ainscough is a Technical Engineer at h2x.
Article published: September 1, 2026
Last updated: September 1, 2026